USB Boot Ubuntu Server 20.04 on Raspberry Pi 4
Learn how to USB boot Ubuntu Server 20.04 on a Raspberry Pi 4. SD cards are painstakingly slow and are prone to data corruption and failure. Fix all of this by upgrading to an SSD drive!
📅 July 25, 2020
Hey folks. In todays guide I'm going to be showing you how to USB boot Ubuntu 20.04 on a Raspberry Pi 4.
Keep in mind that this will require manually editing files and using files from the master branch of the Raspberry Pi firmware. Also this guide tailored towards Linux and Mac users.
So with that out of the way let's get started.
Update firmware to support USB Booting
First things first you need to make sure that your Raspberry Pi 4 supports USB Booting. In order to do this you will have to install Raspbian on an SD card and update the firmware. To do this reference this video. You'll want to watch up to the part where he verifies the boot loader is updated, around 7:56. If you already updated your bootloader skip to the next step.
Download 64 bit version of Ubuntu Server
Now we need to download the 64bit version of Ubuntu Server for Raspberry Pi 4. Then we'll flash the image to our SSD using Raspberry Pi Imager.
Visit the Ubuntu Raspberry Pi download page and grab yourself the 64 bit version for the RP4.
Flash Image to SSD
After downloading our image we'll need to install Raspberry Pi Imager. Visit the Raspberry Pi Downloads page and install it on your computer.
Next open Imager. Click "Choose OS" & find your newly downloaded image of Ubuntu Server. After that click on "Choose SD Card" and select your SSD drive. Finally click Write and wait for the process to finish.
Mount system-boot partition on SSD
Now we need to mount the system-boot partition on the SSD drive in order to change some things.
sudo mkdir /mnt/ssdboot
sudo mount /dev/sdb1 /mnt/ssdboot
cd /mnt/ssdboot
Uncompress the kernel
IMPORTANT: You will have to rerun this step everytime ubuntu updates the kernel.
First we're going to uncompress the vmlinuz file into vmlinux. This is because booting from a compressed 64bit arm kernel is not currently supported.
Find out where the gzipped content starts in the image.
od -A d -t x1 vmlinuz | grep '1f 8b 08 00'
Expected output
0000000 1f 8b 08 00 00 00 00 00 02 03 ec 5b 0f 74 54 e5
The first string of numbers 0000000 is the location that were looking for. In this case its right at the beginning of the image.
Now use dd to extract the data and zcat to uncompress it into a file. If your number was something other than 0000000 make sure you put that number as the skip value.
dd if=vmlinuz bs=1 skip=0000000 | zcat > vmlinux
Update config.txt for booting
Now that we have the uncompressed image we'll want to update the config.txt file in order to tell the Pi how to boot.
Edit config.txt
vim config.txt
Start by commenting out all of the [pi*] blocks. Comment out the block and it's options. Should look like this.
#[pi4]
#kernel=uboot_rpi_4.bin
#max_framebuffers=2

#[pi2]
#kernel=uboot_rpi_2.bin

#[pi3]
#kernel=uboot_rpi_3.bin
Add kernel=vmlinux & initramfs initrd.img followkernel in the [all] section. Leave the rest the way it was before.
[all]
arm_64bit=1
device_tree_address=0x03000000
kernel=vmlinux
initramfs initrd.img followkernel
Update .dat & .elf files
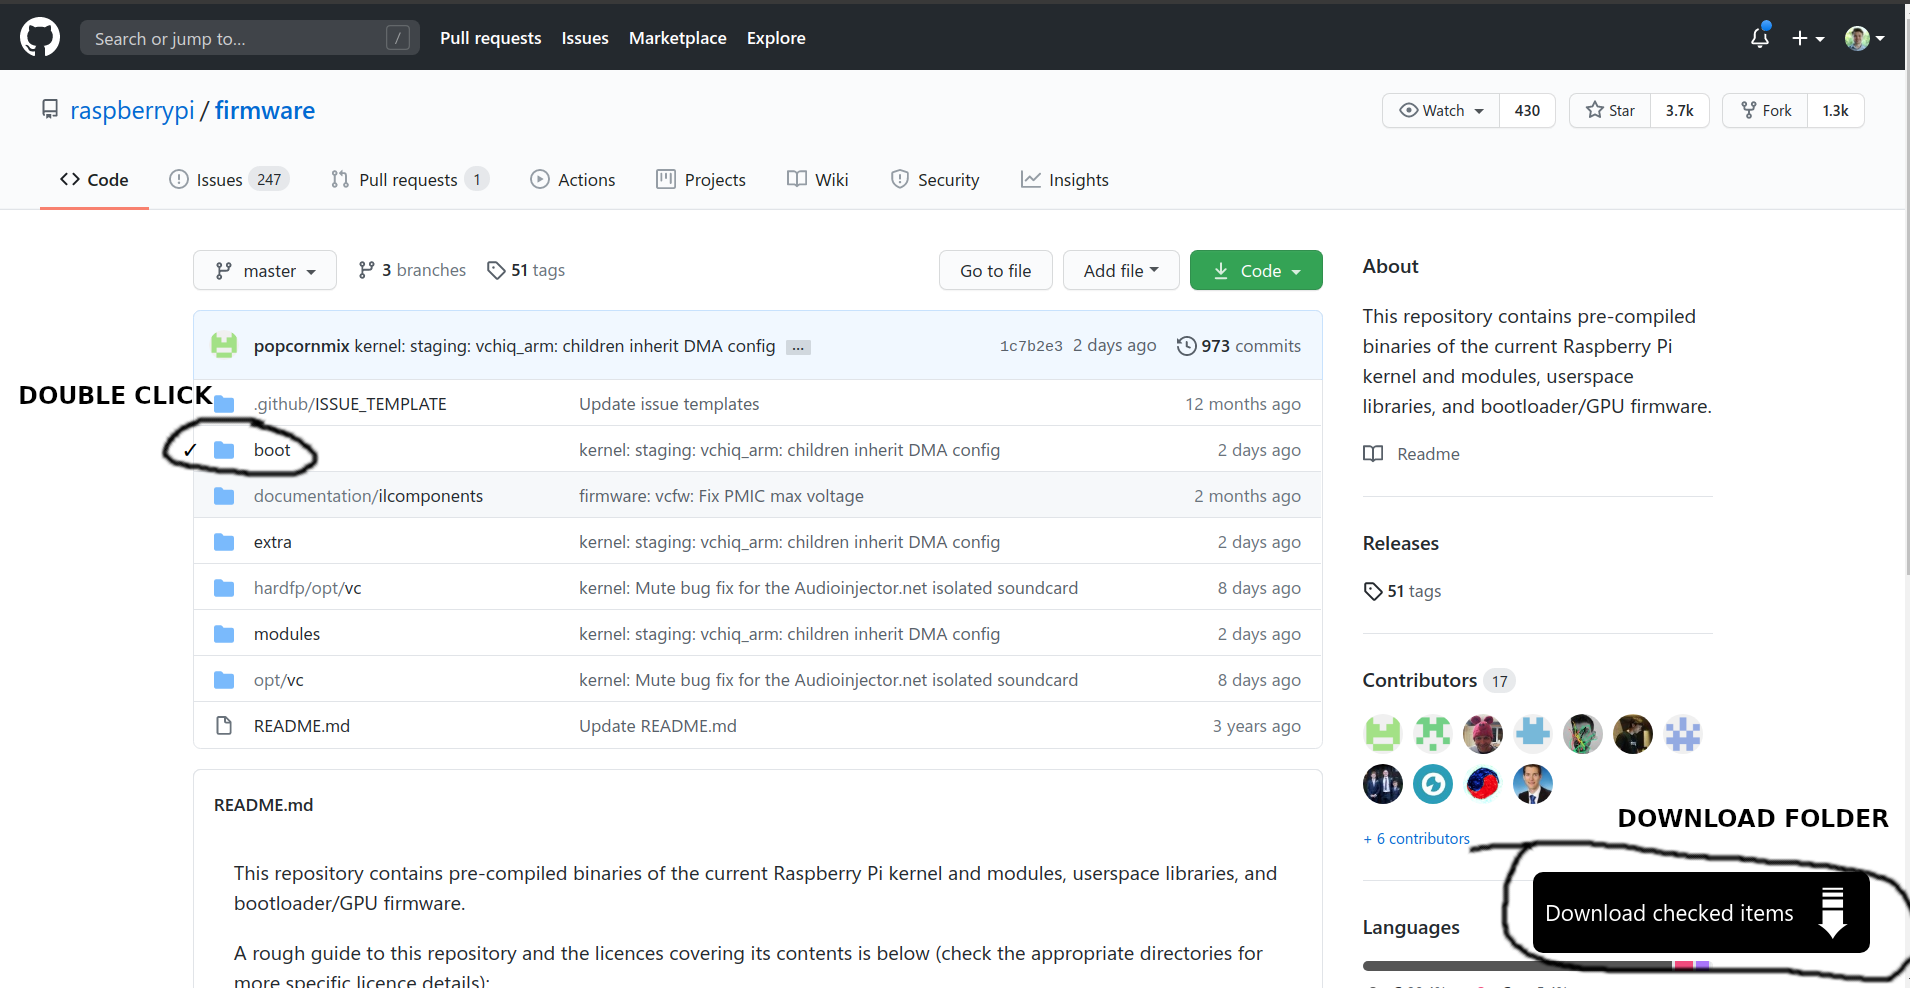
Now we need to update the .dat & .elf files to the latest version in the master branch of the raspberrypi/firmware Github.
Download boot folder
Visit the link above and download the folder using something like GitZip.

Copy files from downloaded folder
Next copy all of the .dat & .elf files into the boot folder. Overwrite all files.
cp ~/Downloads/firmware-/boot/*.dat ./

cp ~/Downloads/firmware-/boot/*.elf .
BOOT
Now you're ready to boot your Raspberry Pi. Make sure the SD card is unplugged. Unmount the SSD from your computer. Plug it into your Raspberry Pi and power on.
Afterward
If you are having slow DNS look up. Eg. sudo apt update is really slow. Make sure to update /etc/resolve.conf with a good name server.
#nameserver 127.0.0.53
nameserver 1.1.1.1
nameserver 1.0.0.1
Sources
- https://www.raspberrypi.org/forums/viewtopic.php?t=275291#p1667965
- https://www.raspberrypi.org/forums/viewtopic.php?f=131&t=268476#p1666154
- https://community.home-assistant.io/t/error-native-usb-boot-without-sd-card-for-the-raspberry-pi4-ssd-boot/199888
- https://github.com/raspberrypi/firmware/tree/master/boot
- https://superuser.com/questions/298826/how-do-i-uncompress-vmlinuz-to-vmlinux