How to Setup RainLoop Webmail on Ubuntu Server 18.04
RainLoop is an free, opensource email client that you can install on your own server. RainLoop allows you interface with your IMAP & SMPT servers in order to provide a simple, modern and fast email experience online.
📅 May 12, 2019
In this guide I will show you how to setup your Ubuntu server with a basic LEMP stack and then install RainLoop on top of that stack. I will be using Nginx in this tutorial instead of apache for my webserver.
Install NGINX
First we need to install nginx on our ubuntu server. It's pretty easy to install nginx just run the following command.
sudo apt-get update && sudo apt-get upgrade -y
sudo apt-get install -y nginx
Now that you have nginx installed let's setup our firewall to allow ssh and nginx connections.
Allow SSH and Nginx through firewall
To allow SSSH & Nginx through your firewall run the following commands.
sudo ufw allow 'OpenSSH'
sudo ufw allow 'Nginx HTTP'
# If you are using https then add this as well
sudo ufw allow 'Nginx HTTPS'
Now let's enable the firewall on our server.
sudo ufw enable

# The staus output of this command should show active.
sudo ufw status
Time to install and configure MySQL Server
Install and configure MySQL
sudo apt-get install -y mysql-server
Secure MySQL Installation
Now that we installed mysql we will want to secure the default installation to make our server safer.
Run the following command to start an interactive script that will guide you through securing your mysql installation.
sudo mysql_secure_installation
The first prompt will ask you whether you would like to use the VALIDATE PASSWORD PLUGIN. This plugin tests the strength of your passwords to ensure you are not using any weak passwords. Unless you are working with a local development environment you should enable this plugin.
VALIDATE PASSWORD PLUGIN can be used to test passwords
and improve security. It checks the strength of password
and allows the users to set only those passwords which are
secure enough. Would you like to setup VALIDATE PASSWORD plugin?

Press y|Y for Yes, any other key for No:
Press Y and then Enter to use the plugin.
The next prompt will ask you how secure you would like your password passwords to be. I would suggest pressing 1 and Enter to select the medium strength. This setting will require uppercase and lowercase letters, numbers and special characters to be used in the password. It will also set the minimum passwords length to 8 characters.
There are three levels of password validation policy:

LOW    Length >= 8
MEDIUM Length >= 8, numeric, mixed case, and special characters
STRONG Length >= 8, numeric, mixed case, special characters and dictionary                  file

Please enter 0 = LOW, 1 = MEDIUM and 2 = STRONG: 1
Next you will be asked to enter your new root password. Enter a strong password to continue.
Please set the password for root here.

New password:

Re-enter new password:
Press Y to remove anonymous users
Press Y to disable remote root login
Press Y to remove the test databases
Press Y to reload the privilege tables.
When you are finished you should see All done!
Now let's move on to allowing password logins for the root mysql user.
Allow password logins for root user in MySQL
sudo mysql
Run the following command to output a list of all mysql users and their authentication method.
SELECT user,authentication_string,plugin,host FROM mysql.user;
If the root user has a plugin of auth_socket then proceed in this section. However if you see mysql_native_password then you can skip to [Install PHP](#Install PHP ).
Now let's allow the root user to authenticate with a password. Change 'password' to your new root password.
ALTER USER 'root'@'localhost' IDENTIFIED WITH mysql_native_password BY 'password';
Now finalize the changes by running FLUSH PRIVILEGES.
FLUSH PRIVILEGES;
Check to make sure the authentication method has changed for the root user.
SELECT user,authentication_string,plugin,host FROM mysql.user;
Now you should see mysql_native_password under the plugin column.
Exit mysql
exit
Try logging into mysql again with the root user.
mysql -u root -p
Type in the password and you should be logged into mysql.
Now let's install php and configure nginx to process php requests.
Install PHP
Make sure ubuntus universe repository is included in apt.
sudo add-apt-repository universe
sudo apt-get update
To install php and all of the required php extensions for RainLoop run the following command.
sudo apt-get install php-fpm php-curl php-xml php-mysql
Now let's move on to configuring nginx for processing php requests.
Configure Nginx for processing PHP requests
Edit or create a file in /etc/nginx/sites-available/ name the file yourdomain.com, make sure to change yourdomain to your actual domain.
sudo vim /etc/nginx/sites-available/yourdomain.com
Inside the file add the following code or make sure the code looks like this.
server {
        listen 80 default_server;
        listen [::]:80 default_server;
        root /var/www/html;
        index index.php index.html index.htm index.nginx-debian.html;
        server_name yourdomain.com;

        location / {
                try_files $uri $uri/ =404;
        }

        location ~ \.php$ {
                include snippets/fastcgi-php.conf;
                # USE THIS LINE IF YOU INSTALLED php-fpm
                fastcgi_pass unix:/var/run/php/php7.2-fpm.sock;
        }

        location ~ /data {
          deny all;
        }
}
Now let's test our newly made config.
sudo nginx -t
If the test is successful then you are all set configuring your server. You can now move on to installing RainLoop.
Installing and Setting Up RainLoop
First we will download and install RainLoop. Afterwards we will log into the RainLoop admin panel and configure settings to the web app to connect to our newly created rainloop database.
Install RainLoop
When first installing nginx the default owner of the www/html is root. In order to download and run our installer file we will need to temporarily change the owner of /var/www/html/ to your currently logged in user (please don't be logged in as root).
sudo chown -R ubuntu: /var/www/html/
In order to install RainLoop we will have to download the installer into our /var/www/html/ directory and run it with php.
cd /var/www/html/
rm -rf ./*
Download and run the installer.
wget -qO- https://repository.rainloop.net/installer.php | php
After running this command you should see a message saying [Success] Installation is finished! If you don't get this message then your currently logged in user is most likely not the owner of /var/www/html/, chown yourself as the owner and run the command again.
Now let's setup the correct owner and permissions for RainLoop.
find . -type d -exec chmod 755 {} \;
find . -type f -exec chmod 644 {} \;
sudo chown -R www-data: /var/www/html
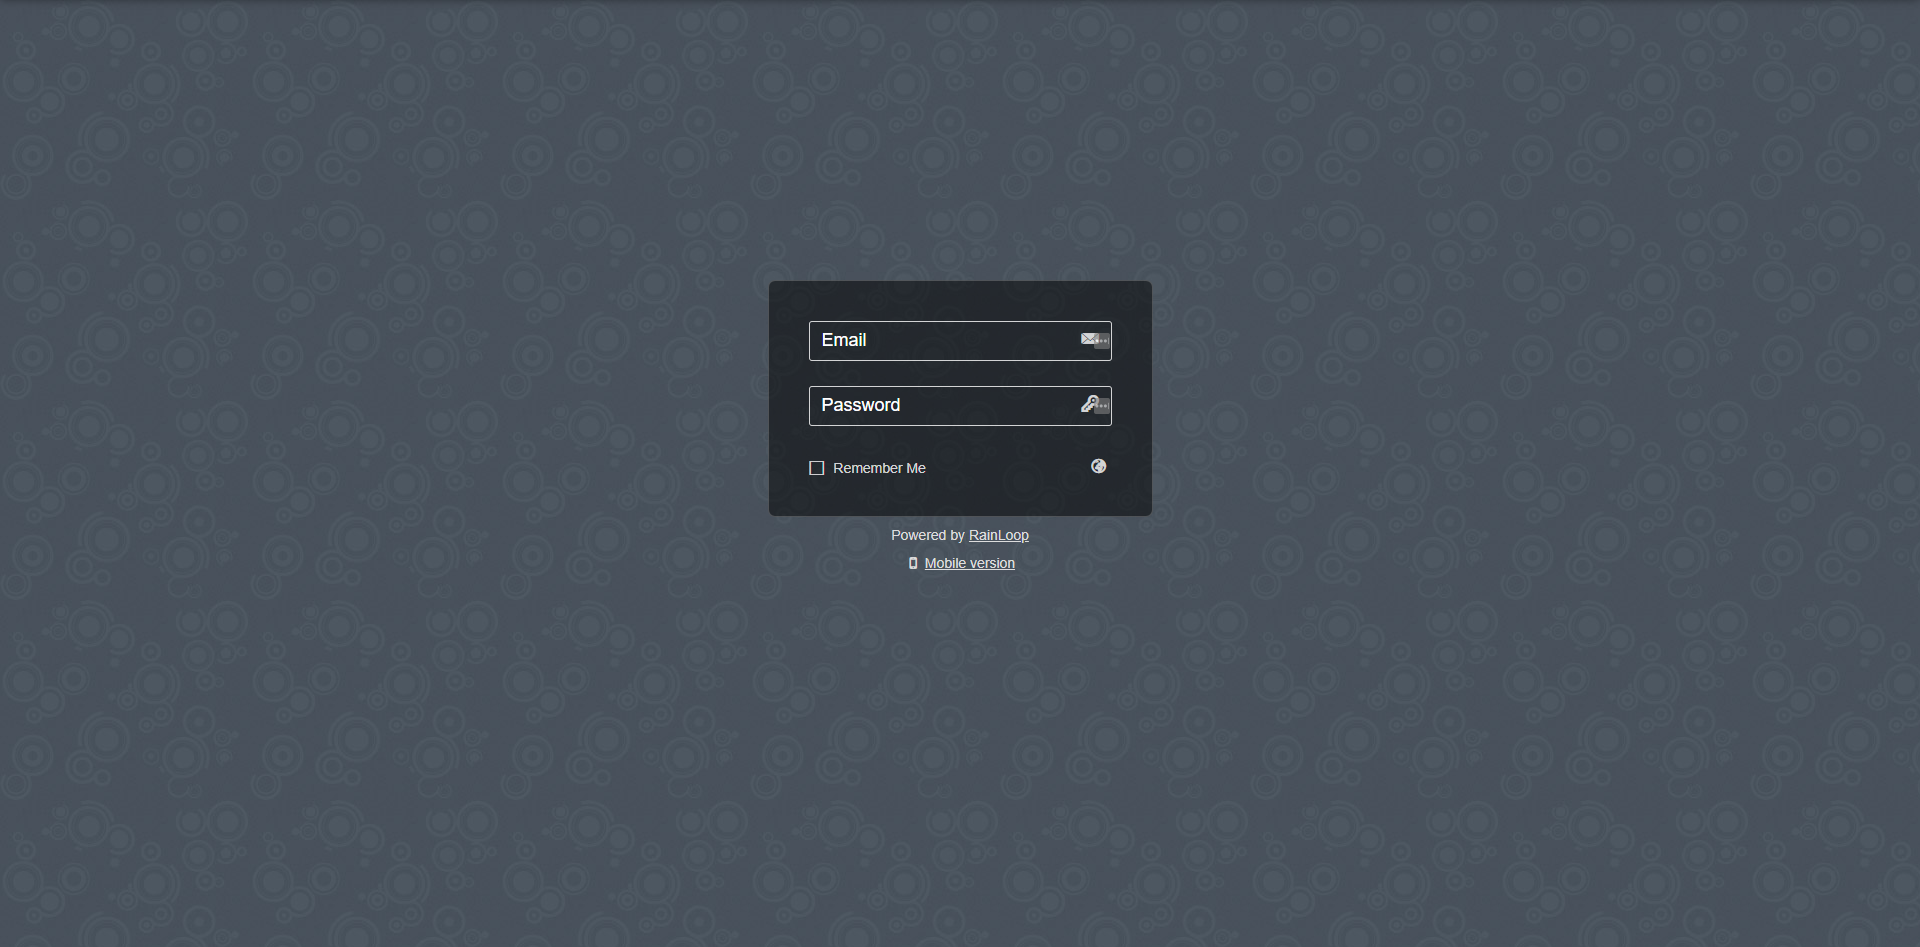
Now let's open up a web browser and navigate to our servers url. In this case it would be http://yourdomain.com
You should see a RainLoop Login screen like this.
Setup Contact support in RainLoop
In order to get contacts working in RainLoop we will have to create a mysql database for rainloop and then log into the rainloop admin panel and change our settings in order to connect rainloop with our database.
First log into mysql
mysql -u root -p
Create a database for rainloop
CREATE DATABASE rainloop;
exit
Now open your browser again and navigate to yourdomain.com this time add a /?admin to the end of the url to visit the admin login page.
The url should look like this http://yourdomain.com/?admin

The default admin login credentials are username admin and password 12345.
Login and right away change that password to something more secure.
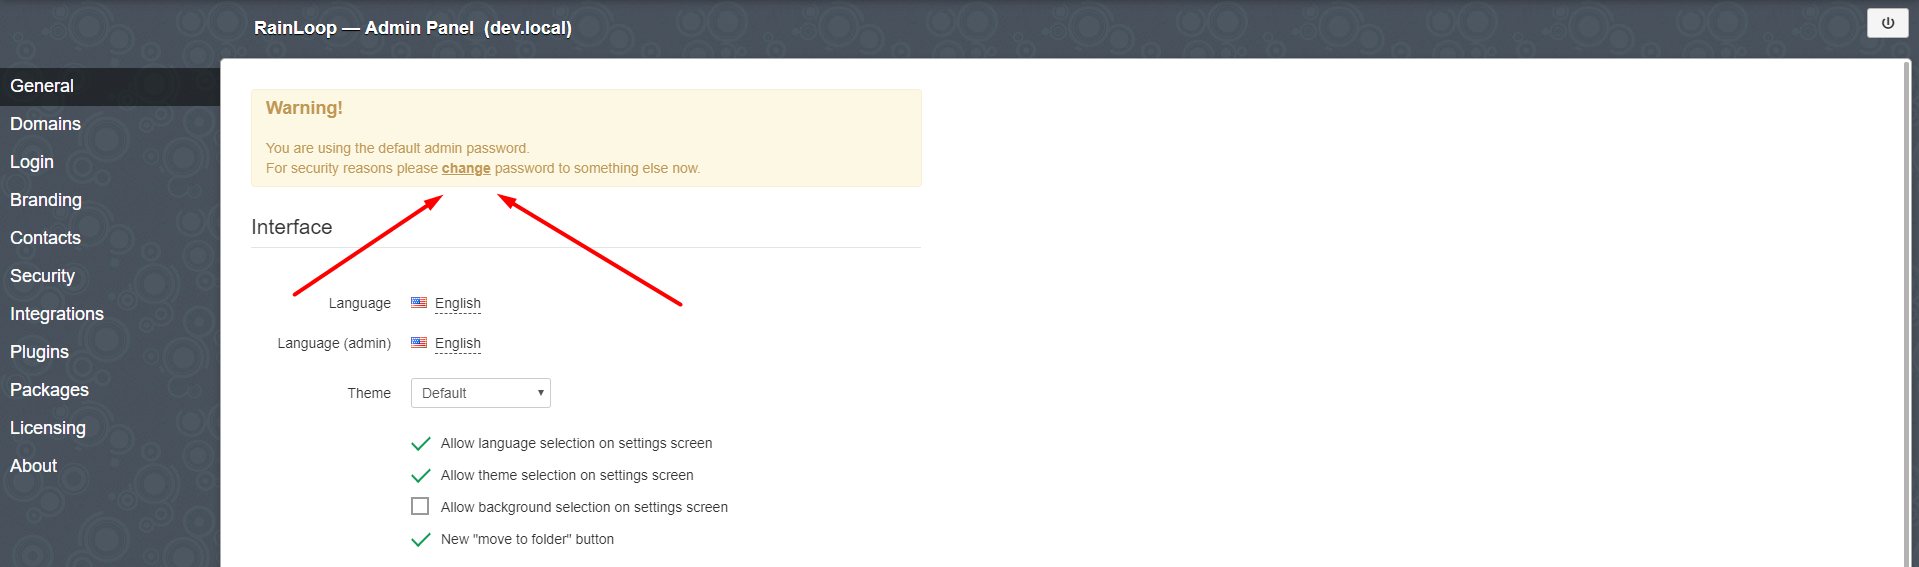
Run through the steps to change your password.
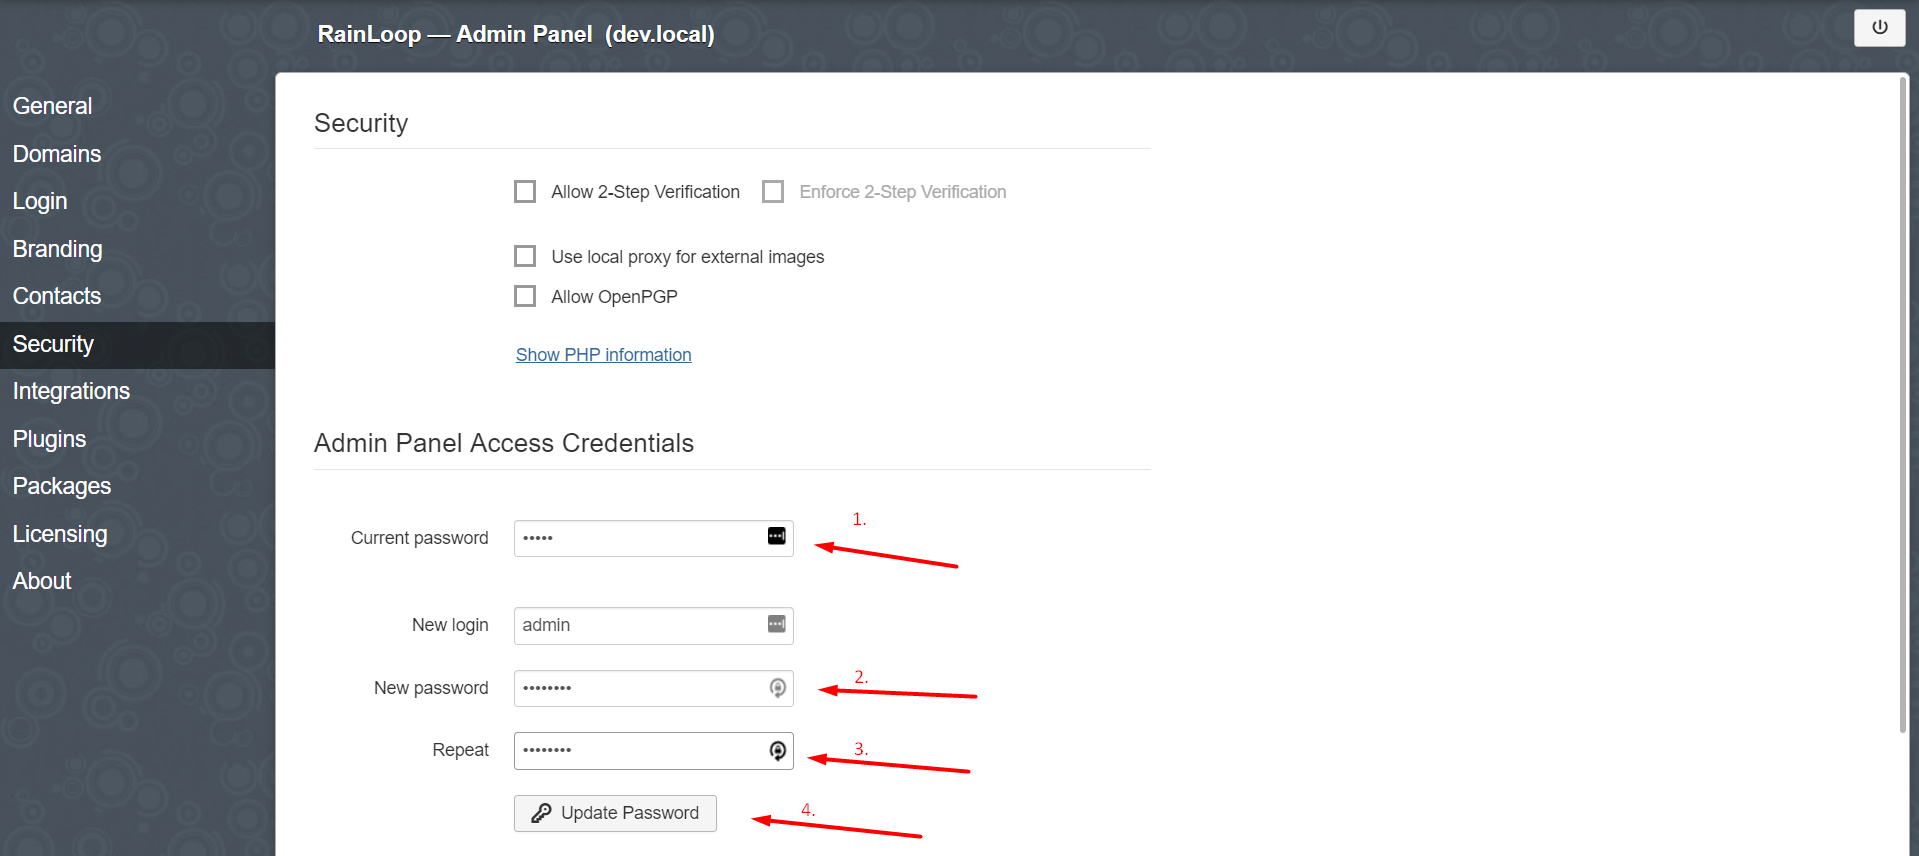
After you have changed the password let's move on adding contact support.
Click "Contacts" in the sidebar menu on the left side of the page.
Follow these steps
- Click the checkbox to enable contacts.
- Change the type to "MySQL"
- If you are not using root then change to the username to the correct username. Otherwise skip to the next step.
- Update the password with the correct password for the user.
- Test the connection
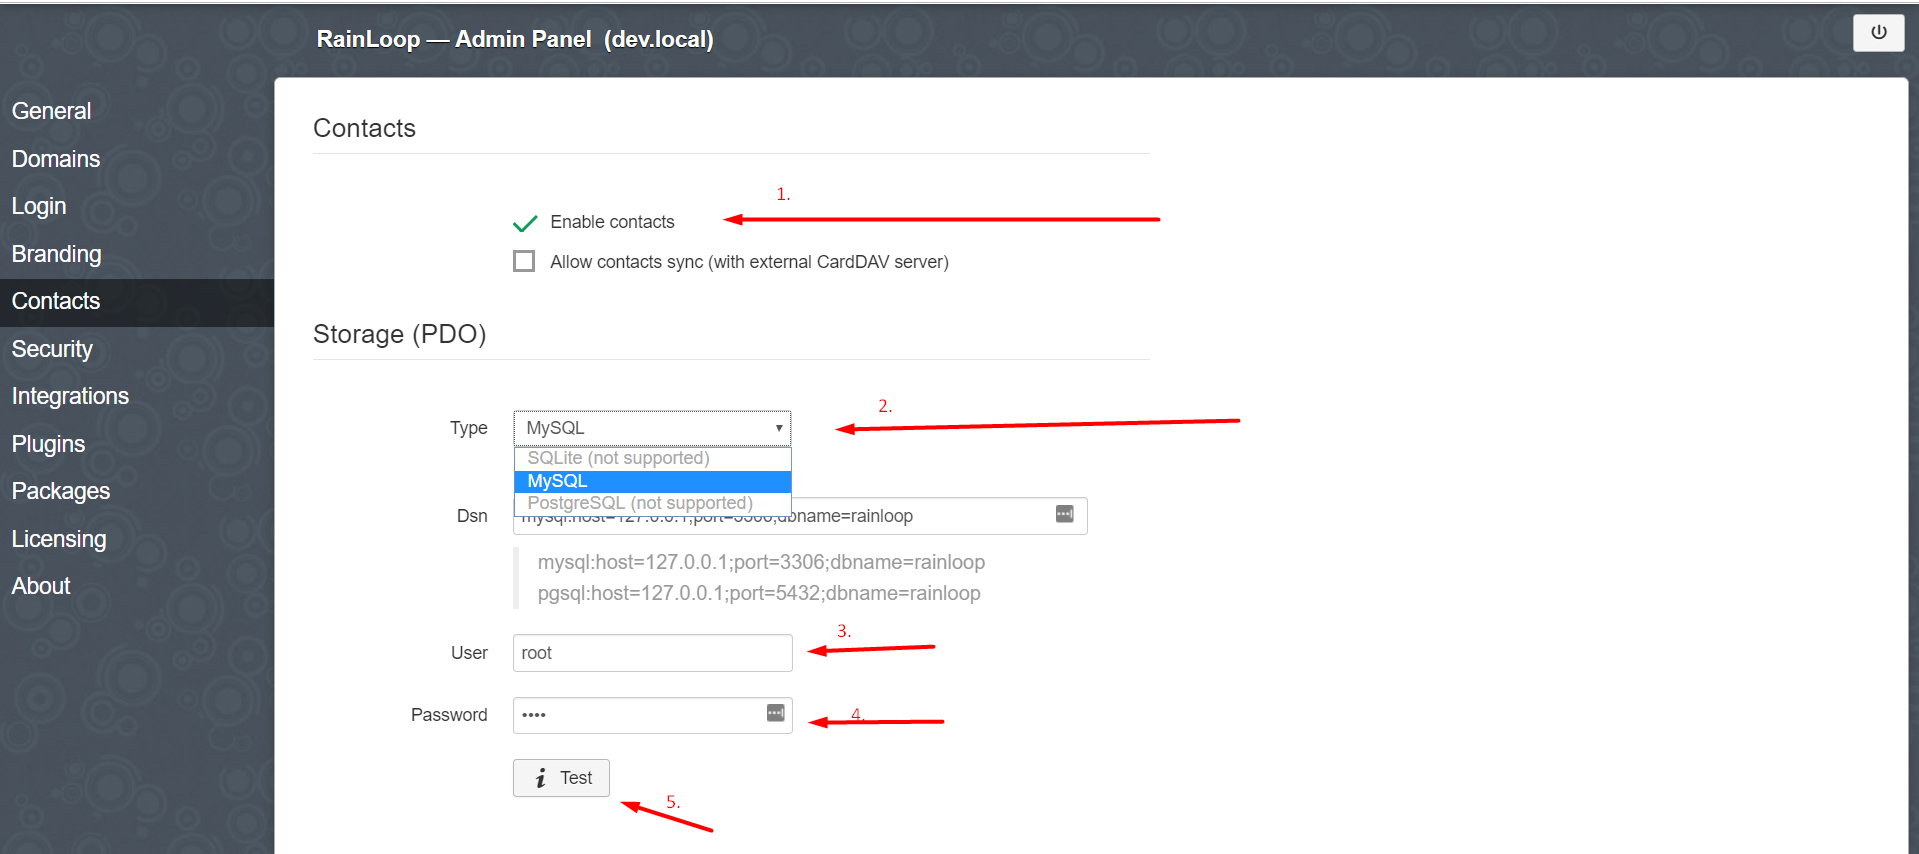
If the Test button turns green then the connection was successful.
Finished
Congratulations. You are all finished installing RainLoop on Ubuntu Server 18.04. Now you are ready to connect RainLoop with your IMAP and SMPT server.